Ever wonder how your competition’s getting all those leads when your marketing game is identical? Maybe there’s a way of reaching out to prospects to boost sales that you aren’t leveraging yet. Marketing is so much more than just showcasing your product, and even the most trivial factors might affect sales by unimaginable margins.
In this article, we’re going to talk about Cold Emails and how they can up your marketing game. We’ll show you how to get started building your own cold email campaigns, maintaining an email list, and all the related shenanigans.
Cold Email refers to an email that you send to a potential customer without prior contact. It is usually sent with the purpose of advertising/selling your product. They’re basically a less obtrusive and more effective way of cold calling.
Now, if you’ve watched The Wolf of Wall Street, you know how Jordan Belfort made a fortune by targeting the top 1% of clients at Stratton Oakmont. Did you know how he targeted them?
Cold calling. That’s it. Just smile and dial.
But that would be the case when email was not as widely used. Today, however, most people have an email address before they can walk. So it would make sense to leverage the power of cold emails while you can.
How can you use cold email?
While most people think cold emails can only be used for sales, this is simply not true. Though you certainly CAN improve your sales, cold emails can help you with so much more -
Lead Generation - Lead generation is an important step for your online business to thrive. Incidentally, over 80% of marketers use cold emailing for this purpose. It helps you build trust, credibility, and curiosity in people who might actually be interested in your product.
A strong subject line can go a long way when advertising your project. If your product caters to a problem, start the email with something relatable. If you can hit the pain point of your prospect, there are high chances that you can convert and retain leads.
Try putting yourself in the shoes of your prospect. This will give you a perspective of what your customers actually need, and how you can better bridge the gap between the two.
Invitation and Event Promotion - Almost every event usually has certain characteristics such as a date and venue, agenda, speakers, and so on. While the organizers know all the intricacies, the audience does not. When sending out a cold email for an event promotion, you ought to convey these details very clearly.
Are you organizing an event and want maximum audience participation? Is it a webinar, or maybe a podcast? No matter the event, cold emails are an excellent way of sending out invites to interested people.
Break the event details down by creating digital flyers to intrigue attendees and your audience. While you can use catchy phrases and subject lines for the same, it isn’t over with the conclusion of the event. Follow up emails are a must. You can reach out to people who could not attend the event with details like what the event was about and what they missed.
Hiring and Recruitment - This might come as a surprise to some, but organizations actually HIRE using cold emails. With no offense to the LinkedIn community, cold emails are just as effective when hiring as LinkedIn.
Finding the right candidate for a job can be daunting, even more so when you have a full inbox of potential employees. Instead, you could source a list of the right fits, research their requirements and personalize your message. Then use the power of cold emails to connect with them.
When setting up a recruitment email campaign, you need to be brief and leverage visual tools. Since your primary goal here is to get an audience with the candidate, the only question from them that you need to address is - “What’s in it for me?”
Link Building - Using cold emails to strengthen your website’s backlink profile? While not everyone can reap the benefits, it sure is doable. The secret, however, is perspective and personalization.
Most marketers go all out sending emails to every email address they can get their hands on thinking “the more the merrier.” This usually backfires without adequate research, intent, and personalization. To cultivate a sufficient ROI is to tread with caution and a strategy.
Since link building strategy is something that mostly marketers and SEOs undertake, reaching out to such profiles has high chances of a greater ROI. It is also important to verify your contacts before you set off with the campaign. A higher bounce rate could hamper your deliverability rate and lead your emails to spam folders.
Networking - LinkedIn and cold emails once again find themselves at cross-roads, and for good reason. It is surprising how many people are willing to go out of their way for something as simple as a cold email.
Regardless, it is important to structure and personalize the email well. You ought to introduce yourself, and how your interests align. Make them see the mutual benefits of the connection, and ask them for some advice that you think might establish intrigue.
Setting up your cold email campaign
#1. Get a mirror domain
When it comes to sending out emails, you’d be better off sending them through a separate domain. This is one piece of advice almost every professional marketer follows, and there’s no reason not to.
It is beneficial to buy 3-4 domain names, and 2 emails for each of the domains. This way you have over 6 different email addresses to set up your cold email campaign. There are primarily two reasons for this -
- The reputation of your business is at stake, so you might want to play it safe.
- More importantly, cold emailing requires you to do a lot many experiments. You can’t expect results without that. Hence, the more the merrier.
Another thing you might want to remember is that you shouldn’t begin outbound campaigns with newly created emails. That is something for when you’ve given the new domain some time to thrive and build a reputation.
#2. Sign up with an email service
Before setting up your email campaign, you will need a G-Suite account to verify your domain. However, don’t worry if you don’t have one yet. Below is a step by step guide on How to set up a Google Workspace account and verify your domain -
- Visit the Google Workspace website to view the products included and pricing plan. The primary difference between different plans is the amount of storage that you use and the number of meeting participants.
- Get started with any of the plans. For the purpose of this article, we’ll be going with the Business Standard plan.
- Enter the name of your business along with the number of employees. It will then prompt you to enter your full name and the current email.
- Now depending on whether or not you have a domain name, you can either purchase one, or use your existing domain. Namecheap and GoDaddy are both incredible domain registrars, and you can use either.
- If you already have one, enter the domain name and click Next. You can use the same domain to set up the account.
- Google will ask you if you wish to educate your users. You can ignore it for now by clicking on “No Thanks.”
- Next you’ll be prompted to set up an account and review your payment plan. From there, you’ll also need to review your contact information and payment details.
- Your Google Workspace account has been created and you are now ready to sync this new email with Gmail. Click on ‘Continue to Setup’.
- Once you are in the Admin Console, click on Activate Gmail for ‘your domain name’. You might have to wait for an hour for Gmail to sync with your domain’s email.
- Google will then ask you to sign in to your domain host to activate your Gmail account. Click on the Connect button to authorize Google verification. Google also allows you to create new users with your team.
Now you’re all set to test the new email, as well as to set up your Cold Email Campaign.
#3: Domain verification (Setting up SPF, DKIM and DMARC records)
Before the 70s, emails were not very different from paper notes sent to computers. Since they were addressed to the machine, they weren’t secure either. Things changed with the introduction of the ‘@’ symbol by Ray Tomlinson in 1971. The messages could now be securely sent to users instead of computers.
However, as it grew mainstream, so did the attacks. As spam and malicious attacks grew rampant, you couldn’t even tell if an email was sent by a legitimate address. This is where DMARC records come into play.
SPF and DKIM are DMARC email authentication techniques that confirm that a certain email was sent by an authorized sender. While SPF checks for the IP address of the server on the sender’s end, DKIM checks for a public and a private key specific to the sender.
What is SPF
Sender Policy Framework (abbreviated as SPF) is a mechanism that ensures that it is YOU who is sending the emails. It helps DNS servers communicate to check if someone else is sending the emails on your behalf. With SPF verification, you don’t even have to worry if your email is somehow hacked since outgoing emails can only be sent through authorized IPs.
Setting up SPF for your domain
You’ll first have to check your current SPF record. Google Apps Toolbox is an amazing tool that lets you do just that. It will ask for your domain and then run some tests, following which it will either show you your current SPF or a notification stating that it hasn’t been set up yet.
The next steps depend upon your domain host. All you need now is to paste a line of code in your console. Depending on your host, it may look like - “v=spf1 include:_spf.google.com ~all”
Let’s break the code to see what it actually means -
- V=SPF1 - This part of the line identifies it as an SPF record along with its version.
- Include:_spf.google.com - This part lists out the domains that can be used to send out emails authorized by the user. It varies from user to user and depends on the domains listed by the user.
- ~all - This part states that if an email is sent from a server not listed in the previous section, it will be tagged as a soft fail. This means although it can be let through, it will be marked as spam or suspicious.
Zoho, Microsoft, and Google are some of the most common domains used for cold emailing. Use these links to set up your SPF to secure your email.
What is DKIM
Acronym for Domain Keys Identified Mail, DKIM is an additional security layer that ensures it is YOU who sends the email, and not some malicious hacker. It helps you sign your email with a private key that helps the recipient server verify its authenticity.
It works by encrypting an additional signature and inserting it in the header of your email. For this to work, you need to have two keys -
- Private Key - This is the encrypted digital signature included in the header of your email. The digital signature is unique to your domain and can be decrypted only using the Public key.
- Public Key - This key is added to your DNS record based on DKIM standards. The recipient’s server retrieves the public key to decrypt the Private key in the header of your email.
Much like SPF, DKIM also pivots around inserting a line of code that specifies the public key into the server’s records. Every time someone gets an email from you, the recipient server will try to decrypt the hidden signature using the public key, and hence offer increased deliverability and authenticity.
Setting up DKIM
First, you’ll need to set up a Public Key. By default, the DKIM signature in Google Apps is turned off. So if you’re using them to send your emails, you have to manually switch them on via Google Admin Console.
Once you have the public key, paste the generated text record into your DNS records. All that’s left to do is to turn your email signing on. You can now send out emails with an encrypted signature along with your unique private key.
For some popular domains used for cold emails, here’s how you can set up a DKIM for Google, Microsoft, and Zoho.
What is DMARC
The DMARC (Domain-based Message Authentication, Reporting, and Conformance) comes into play when either of the SPF or DKIM records fail to authenticate the email. It essentially allows the recipient server to do one of three things with an incoming email -
- Allow the email in the inbox
- Quarantine the email (to the spam folder)
- Reject the email
Setting up DMARC on your domain
Setting up DMARC on your domain is relatively easy and can be accomplished in a couple of steps. Follow the instructions to make sure your emails are sent to the recipient’s inbox -
- Log into domains.google.com and choose the domain that you wish to activate DMARC records for.
- Click on DNS.
- You’ll see a text - “v=DMARC1; p=none; rua=mailto:yourdomain.com”. Replace the highlighted text “yourdomain” with the name of your domain and click ‘Add’.
And voila! You’ve successfully set up your DKIM and SPF records along with DMARC. From a technical standpoint, your emails should land nowhere outside the recipient’s inbox.
What is an MX Record
An MX (Main Exchange) is a type of DNS record that helps specify the mail servers that accept incoming mail and sets their priority. While the domain name or the A record can lead you to the website’s server, the mail server isn’t necessarily the same.
An MX record harbors the domain name, TTL (Time To Live), priority, and a value. The priority field is sometimes combined with the value, and the mail is sent to the server with the least value of priority. In case the least priority server is overwhelmed or offline, the next in queue will receive the emails.
Creating an MX Record
- Go to domains.google.com and click on “Create a new Record” in the DNS section.
- Choose MX as the type and choose a TTL that works for you.
- In the data textbox, type in the priority followed by the mail server’s domain. You can choose to fill multiple records here with different priority values.
Namecheap and other domain hosting services offer a similar setup. Use the ‘@’ symbol for default domain name. Make sure that the value of the MX Record should point to an A record and not a CName Record.
Custom Tracking Domains
A Custom Tracking Domain is a URI (Uniform Resource Identifier) that helps you track the open rate and link clicks in your campaign. It could be your own unique domain or a subdomain used exclusively for this purpose.
Custom Tracking Domains can help you shield your sender reputation and enhance deliverability by collecting data without the risk of sharing it with malicious actors. If you do not have a custom tracking domain, you’re probably using a shared domain. Here’s how you can set it up -
- Go to the DNS section of domains.google.com and click on ‘Manage Custom Records’.
- Click on ‘Create a New Record’ and choose the type as CNAME.
- In the hostname, type in ‘trk’ and ‘custom.yourdomain.com’ in the domain name section.
- For the best results, keep your TTL to an hour or 3600 seconds and click on ‘Save’. It will take some time until the records are updated.
- Go to the settings of your email outreach tool and click on ‘Add Custom Domain’. The interface may vary depending on the application.
- Under the ‘Domain and URLs’ type in ‘trk.yourdomain.com’. It should be the same as the value you previously used for the domain name section.
- Apply the custom domain to all email accounts and save the settings.
With all the necessary DNS records, the technical stage has now been set for your email campaign. Now all that remains is to curate a list of the right prospects and send out your emails.
#4 Build your ICP (Ideal Client Profile)
Defining your target audience is fairly simple yet intricate. Depending on your product, your target audience range may vary by region, age, gender, education, or any other field. However, the most successful campaign is one driven by data.
Recognizing your target audience begins with a question - “What are the solutions that your product/service offers?” This helps you triangulate the pain points of your prospects, and allows for a more empathetic communication.
Say you offer a no-code website builder to create MVPs for startups. You can infer that your prospect list will comprise young entrepreneurs, growth hackers, and even some SMEs. You can further narrow it down by identifying the scope of your product.
If the use cases are general, you won’t have to spend a major chunk of your time segmenting your audience or refining your email list. On the contrary, if the use cases are more specific, segmenting and following a more user-specific strategy may work wonders for you.
#5: Find email addresses of leads
Finding the right people to send you emails is tricky. Not only can it affect your sales, but also reduce your emails’ deliverability rate and label them as spam. So below, we’ve discussed some methods to collect prospect emails for an effective cold email campaign.
Use LinkedIn - Plugin
LinkedIn is one of the most underrated platforms for finding prospect emails. All you need to do is go to your prospect’s profile and click on contact info. Most professionals put their emails on LinkedIn for display.
However, if you can’t find your prospect’s email via LinkedIn, ContactOut has your back. It is a free Chrome extension that helps you find contact information of your prospects including their emails and phone numbers.
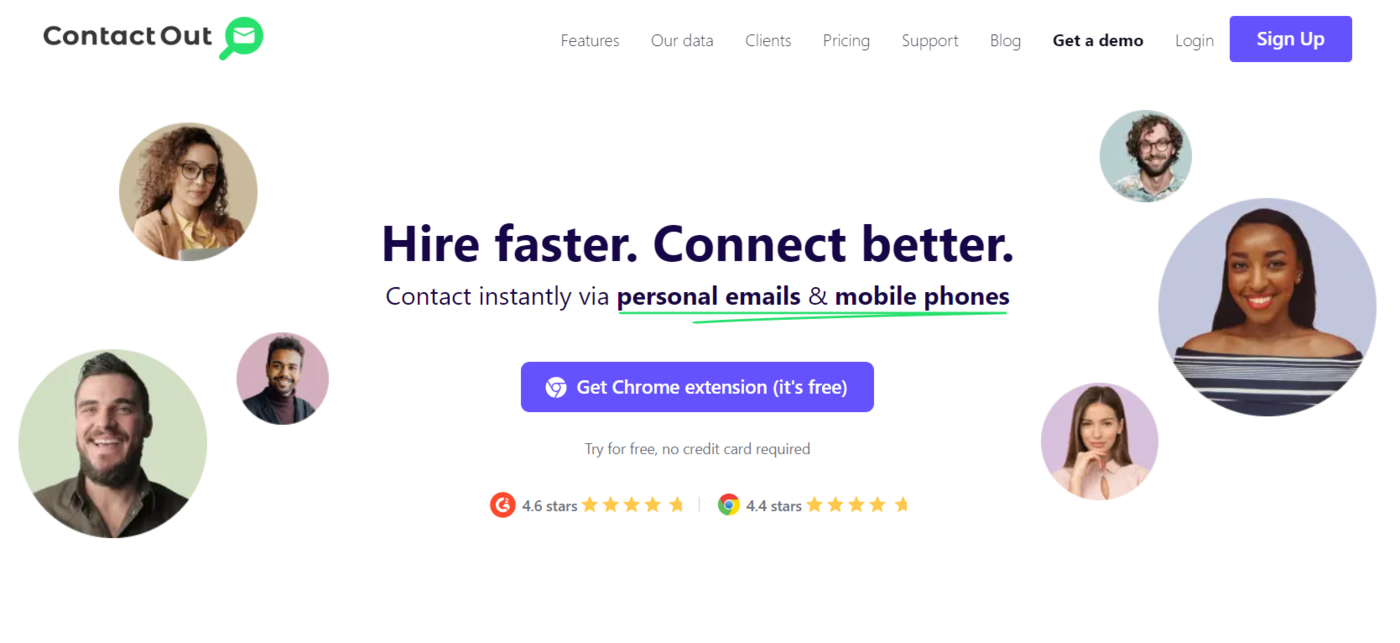
What’s more is that it is used by over 76% of the Fortune 500 companies, and has helped regenerate twice the responses in less than half the time. The emails that they scrape are verified and are 97% accurate.
Lead Magnet Incentive
Lead Magnets are free resources given away to collect user data such as their email. It could be a piece of informational content such as a blog (like this one), a subscription to a newsletter, or even an eBook.
Sometimes referred to as an opt-in-offer, a lead magnet can be a powerful tool for finding prospect emails. Several enterprises have generated thousands of leads and continue to do so.
Join niche groups
Niche groups on social sites such as Facebook, Twitter and Reddit are an excellent lead generation source. Connecting with prospects on such platforms can definitely aid and expedite your email campaigns.
Professionals who indulge in particular tech stacks never run out of questions. Once you establish your credibility in a specific niche, you can never run out of leads, thanks to these social platforms.
All you have to do is engage in some compelling conversation with your prospects and answer their questions. Your audience will do the rest.
Use Email finding tools
If you do not have the bandwidth to find emails manually, email finder tools can do it for you. They offer a list of verified email addresses in mere seconds. Some of the most popular email finder tools are -
Voila Norbert - This tool vaunts a massive database of verified B2B email addresses and offers 50 free leads. It is an intuitive, easy to use tool that helps you find corporate emails at $0.10 per lead.
AnyMail Finder - Another email finder with 20 free credits, AnyMail Finder helps you find email in bulk or individually. All you have to do is enter in the client’s email and the organization that they work in.
Lusha - With 5 free credits per month, Lusha helps you find not just the professional emails, but also personal emails of your prospects. And not just that, Lusha will also help you find your prospects’ contact number and is incredibly easy to use.
#6: Pick the right email outreach tool
Setting up the desired email campaign shouldn’t have to be entirely manual. You can instead choose from a diverse array of email outreach tools to reach out to your prospects. Some of these tools not only schedule emails, but also write one for you based on your products and services.
Lemlist - One of the most popular email outreach tools, Lemlist helps you schedule and write emails, as well as follow-ups. Its features including Lemwarm (that helps you automate the email warm up process) and its ability to personalize your email outreach makes it stand out from others.
Mailshake - Mailshake is used by people across industries including marketing, sales, and entrepreneurs among others. It also allows you to customize your email campaigns by merging tags to track bounce rate, clicks, open rates and other metrics.
Saleshandy - It is an efficient outreach tool that offers high deliverability, personalization, and a seamless automation experience. Sequence reports and template library are just two of the most impressive features that make Saleshandy a must-use email outreach tool.
Reply.io - An intuitive and efficient tool, Reply.io helps you integrate your LinkedIn account with your email campaign to leverage contact details. It facilitates both email and phone based campaigns, and exhibits a comprehensive dashboard enabling a user friendly approach towards cold email campaigns.
#7: Set up From Line and Personal Data
Personal data is crucial to building trust within your audience. The “From Line” is one of the very first things that the reader sees. So it makes sense for it to be consistent with the purpose of the mail. And remember, your identity will speak volumes for your credibility.
There are some general rules that you should follow while setting up a “From Line”. We’ve listed some of them below -
- If you’re using Google mail and other applications, you should definitely fill out personal data. Something as simple as adding a picture can work wonders that you won’t even see coming.
- Align the “From Line” with the purpose of your email. Depending on the context, sending the email as a company and as an individual might make a difference.
- Add the email address from your campaign to an alternative address on LinkedIn. This simply adds to your credibility. Having some referrals and testimonials doesn’t hurt either.
#8: Warm up the Email List
While this part might be slightly tricky, it is also one of the most important ones. Presuming that your recipients might remember you might be a mistake. Not everyone has an eidetic memory. So your first plan of action must be to warm up the email list by introducing yourself and reiterating the values that you offer.
- Reintroduce yourself and remind them of the reason that they are receiving the email. Start with a personalized greeting and tell them that you’ve got something that could help them. Invigorate their interest by sharing what you’ve been up to and how your product/services can benefit them.
- Provide value even in the warmup emails. It could be some free resource, an eBook, a cheat sheet, steps to accomplish something, or any other similar assistance. Offering value every time you send them an email will boost your opening rate by a lot.
- End the email with a subtle CTA. Say goodbye on a high note and with a promise to offer more value in the near future. Ask them to contact you via different channels to get more free stuff or other informational content.
- Keep things simple and warm. While individual warm-up emails are fine, you must not lose sight of the bigger picture. While using pictures can be effective, do not overuse them and strictly avoid spam words.
#9: Write a cold warm e-mail
This is arguably the most important part of your email campaign. Even if you’ve accurately followed the process until now, it wouldn’t make a dent if the email that you deliver isn’t effective. So here are a few tips on how to write the most intriguing and effective email -
- Subject Line - Using cliched statements such as “Incredible offer” or “Just for you” make it seem like spam mail. Instead, think of something that would make the recipient want to open the mail. It should be a “hook” like addressing a problem or providing a solution.
The first rule is to address it directly to the recipient. Say you were to market a social media management platform. A fine subject line would be - “Hey Adam, tracking social media notifications can be tiresome. Here’s an alternative.”
The trick is to keep it short and concise.
- Be Specific - The most precise way to ensure the best conversion rate is to be specific. Everyone deals with a lot of information every day, especially people with an online enterprise, so trust us when we say this, but you do not want to beat around the bush.
If you were to write an email on improving social media marketing strategy, start with something like, “Hey, social media marketing can be tricky, but have you tried these methods that have worked for a multitude of SMEs to increase their revenue by up to 150%?”
To put it simply, focus your email on exactly why you’re reaching out.
- Make it feel like an interaction - Most cold emails today feel like they were copied straight out of an AI-driven copywriter. Once you set the tone with the by-line, you need to make the email conversational. A good method to see if the email sounds good is to read it out to yourself or someone else.
- Touch the Pain Point - A pain point is something that your customer is struggling with. For instance, luxury cars aren’t usually good with mileage. Talk to your prospects about how you can solve these issues.
If you were to write an email on cold emails, you could say, “Hey Adam, writing cold emails can be tricky, not to mention a low response rate could be exasperating.”
- The tone of the Email - When talking to a prospect, you ought to be confident in your product and what you’re offering. Avoid using negative words like, “Don’t miss this offer.” or “Never have I seen something this interesting.”
A positively set tone for a cold email might work in hindsight without you even realizing it.
#10: Collect and Divide the prospect list
Alongside setting up the DKIM and drafting a well-written email, collecting quality prospects is just as crucial. Like it or not, the quality of your base prospects reflects heavily on the deliverability rate. Even if 0.1% of the recipients mark your email as spam, they will either stop being delivered or may end up in the spam box.
Hence it is paramount that you should send emails to people who might actually be interested in your product. This is another classic example of quality over quantity, and mind you it can do wonders.
This also includes verifying the authenticity of individual email addresses. There are several tools you can leverage that validate email addresses based on their activity. Your deliverability may take a massive hit even if as little as 2-3% of emails bounce. So you have to be careful there.
Start small, and grow as you go. It is not a good idea to make a huge email list, to begin with. Even more so when you’re buying it. As shocking as it may seem, email lists with around 150 to 200 emails have a higher opening rate and better results.
Without fixating on the numbers, you should create well-targeted campaigns for the best results. Even a list as small as 20-50 prospects would make for an amazing test campaign.
Track your KPIs
Since we’ve already discussed deliverability and open rate via custom tracking domains, it is time we talk about KPIs that determine how effective your email campaign really is. For this list, we’re going to look at the top 4 KPIs that you should have a keen eye for during your cold campaign.
CTA Clicks - Although it mostly depends on the niche of your business and audience, CTA clicks show a filtered section of your audience with a high conversion chance. You can determine the quality of your email list by assessing the CTA clicks and conversion rate.
Relevant Email responses - Email recipients from your list who have queries regarding your product generally respond to your email. You can determine interested prospects from this metric and leverage it to your advantage.
Response rate for a cold email campaign is generally 1%, but that shouldn’t worry you. Out of the 20-25% of email clicks, a response rate of 1% isn’t all that bothering.
Conversion Rate - If there’s one metric that your entire email campaign revolves around, it is the conversion rate. If your emails can convert around 2-5% of your prospects, you can call it a day. Below 1% however, you’re going to have to change or adjust your strategy.
Overall ROI - ROI is the return on investment from your email campaign. A good email campaign doesn’t come cheap, and hence it’s only natural to expect a decent ROI. It is calculated by deducting the campaign cost from the additional revenue generated from the campaign, and then dividing it with the campaign cost.
Depending on your business, there are various ways to determine your ROI. According to Hubspot, the best cold email campaigns generated an ROI upwards of 7000%. However, the average ROI was around 4200%, which isn’t all that bad either.
Opening Emails and Follow-ups
While follow-ups are a must, you should be careful not to clog up the mailbox. Keep a well-thought-out window between 2 emails, and avoid sending emails during busy hours on weekdays at all costs.
It is a good idea to set up an automated workflow for sending out cold emails. Tools such as Mailchimp would be suffice. However, the best way to do that is to manually set the window between the follow-ups. Make it so that the receiver has enough time to read them and for the message to settle in.
Moreover, during the first couple of days of the campaign, we do not recommend sending a lot of follow-ups. Instead, save them for once you’ve warmed up the list. A window of 2-3 days is good enough to begin sending the follow-ups.
Also, once you’ve begun sending follow-ups, keep the flow steady and increase the number gradually.
Bounce Rate
Ideally you should aim for a Bounce Rate of 0%, but that’s too good to even think of. So you should be well off with a bounce rate of <2%. However, if it rises over this threshold to around 5-10%, do not walk it off.
While bounce rate affects your email deliverability and domain authority, they also give you a lot of insights on your mailing lists. Tools such as GlockApps and MailGun come in quite handy when it comes to dealing with a high bounce rate.
There are various reasons your email might bounce, and tools like GlockApps help you determine and mitigate them. If you have followed the above steps like setting up your DMARC and MX records, a high bounce rate shouldn’t really be on your radar.